Embroidered Flower Bouquet: Planning and Stitching a Hand-Tied Bunch
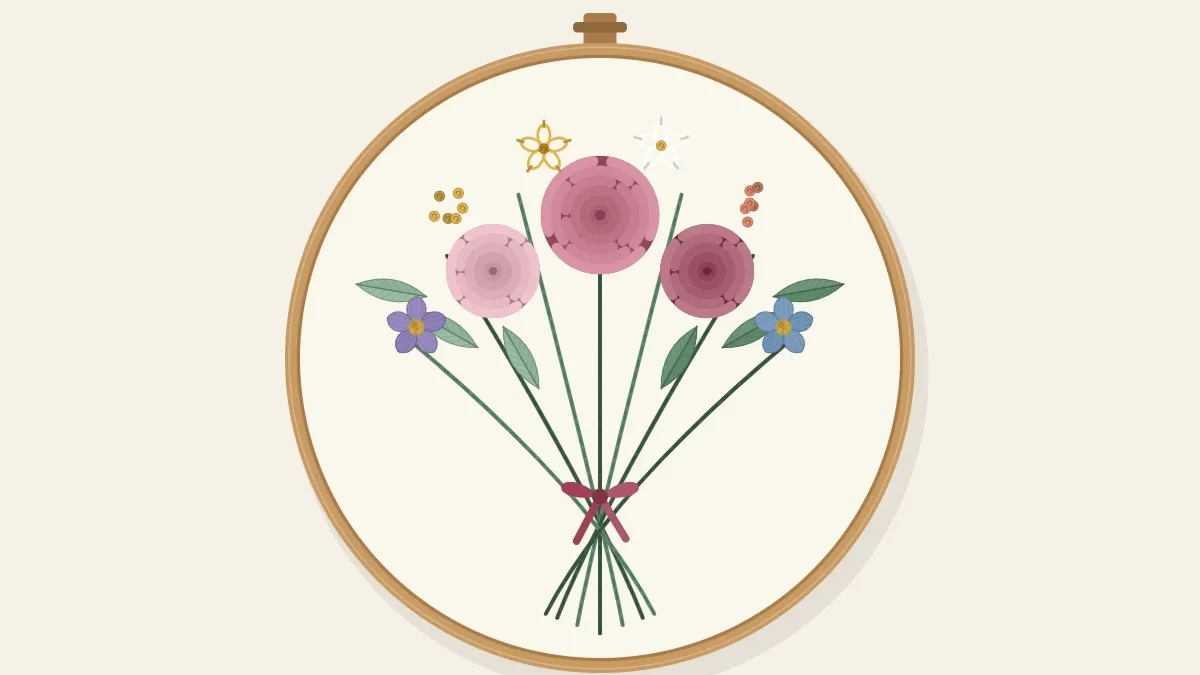
Plan a hand-tied bouquet around three focal flowers, add medium flowers and fillers, cross the stems at the tie and finish with a stitched bow.
Tutorial at a glance
Materials
- Six-strand cotton embroidery floss in a dark and a light value of the main flower color
- Six-strand cotton embroidery floss in a second flower color and yellow
- Six-strand cotton embroidery floss in a filler color such as violet or white
- Six-strand cotton embroidery floss in two greens
- Six-strand cotton embroidery floss in a ribbon color
- Embroidery needles size 5 and size 7
- 6-inch (15 cm) embroidery hoop
- Water-soluble pen
- Small embroidery scissors
A hand-tied bouquet looks complicated in thread, but it is assembled from parts that are each simple: a fan of stems, a few leaves, three large flowers, some smaller ones and a bow. What makes it convincing is the structure underneath. Every stem passes through one tie point, the largest flowers form a triangle, and everything else is fitted around them.
Materials
- Medium-weight, non-stretch cotton or cotton-linen blend in a 6-inch (15 cm) hoop
- Six-strand cotton embroidery floss: a dark and a light value of one main flower color, a second color for the medium flowers, yellow, a filler color such as violet or white, two greens, and a ribbon color
- Embroidery needles size 5 and size 7
- Water-soluble pen, tested on a scrap first
Cut the floss about 18 inches (45 cm) long. Strand counts are given in the table below.
Plan the bouquet on the fabric
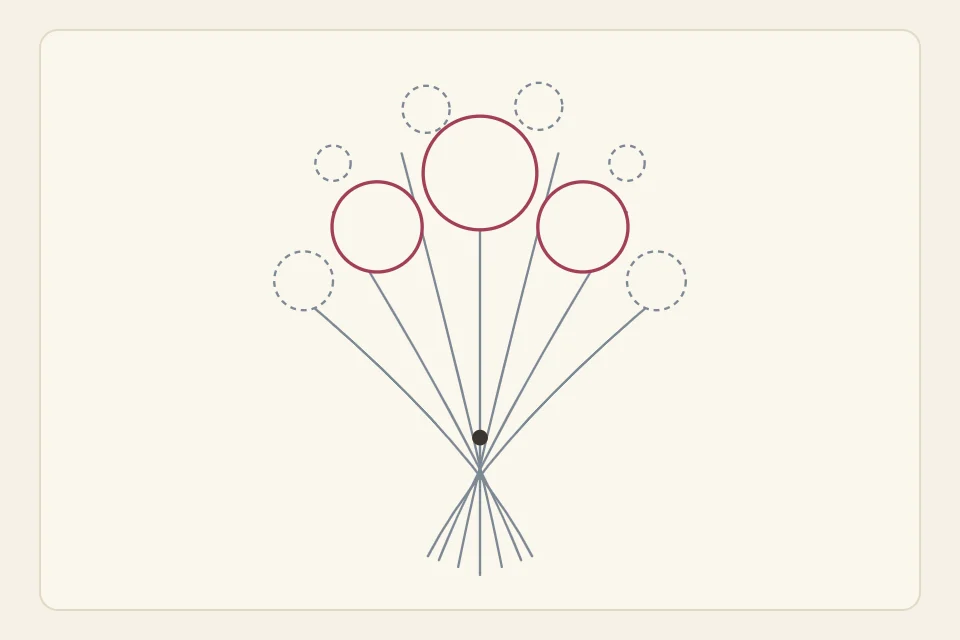
Mark the tie point first: a small cross 1 1/4 inches (3 cm) below the center of the hoop. Everything is measured from it.
Draw three circles 3/4 inch (2 cm) across for the focal flowers. Center the top one 1 inch (2.5 cm) above the middle of the hoop. Center the other two level with a point just above the middle, about 3/4 inch to the left and right of it. The three circles form a triangle with a little bare fabric between them.
Add five circles 3/8 inch (1 cm) across for the medium flowers: one in the gap at the middle of the triangle, two outside the lower focal flowers and two on the upper shoulders of the bouquet. Then mark six to eight filler positions with 1/4-inch (6 mm) circles or short lines around the outer edge. Step back and check the outline: it should be a soft dome about 3 1/2 inches (9 cm) wide and 2 3/4 inches (7 cm) tall, wider than it is high.
Finally draw the stems. Run a line from every circle down to the tie point, curving the outer ones slightly so they sweep in. Below the tie, continue seven or eight of those lines for about 1 inch, each one crossing to the opposite side: a stem that enters from the upper left leaves toward the lower right. That crossing is what makes the bunch look tied and not glued.
Choose a flower for each role
| Role | How many | Drawn size | Suggested stitch | Strands |
|---|---|---|---|---|
| Focal flowers | 3 | 3/4 inch | Woven wheel rose on five spokes | 3 (size 5 needle) |
| Medium flowers | 5 | 3/8 inch | Five detached chain petals around a French knot | 2 |
| Fillers | 6 to 8 | 1/4 inch | Sprays of three French knots, or short lavender-style spikes | 2 |
| Leaves | 8 to 10 | 3/8 to 1/2 inch long | Fishbone stitch | 2 |
| Stems | 14 to 16 | As drawn | Stem stitch | 2 |
| Tie and bow | 1 | Bow about 1 inch wide | Satin stitch band, stem stitch loops | 3 |
The focal roses use the woven wheel stitch: an odd number of spokes, with the thread woven over and under until they are hidden. Work the spokes and first rounds in the dark value and the outer rounds in the light one. The medium flowers are five-petal daisies in lazy daisy stitch, with petals about 1/8 inch (3 mm) long so the flower fits its circle.
Stitch in four stages
- Stems. Work every stem in stem stitch with two strands, from the cut end below the tie up to the edge of its circle. Use the darker green for the stems behind and the lighter one for the four or five that cross in front below the tie. Stop each stem at the rim of its flower circle; there is no need to stitch under a flower that will cover it.
- Leaves. Add eight to ten fishbone stitch leaves along the upper parts of the stems and around the outer edge, pointing outward and up. Let a few run a little way into the focal circles; the flowers will overlap them and look as if they sit in front.
- Large flowers. Stitch the three focal roses. Work the top one first, then the lower pair, so your hand does not rest on a finished raised flower.
- Small filler flowers and bow. Stitch the five medium flowers, then the fillers around the edge. Finish with the tie and bow, which lie over the stems.
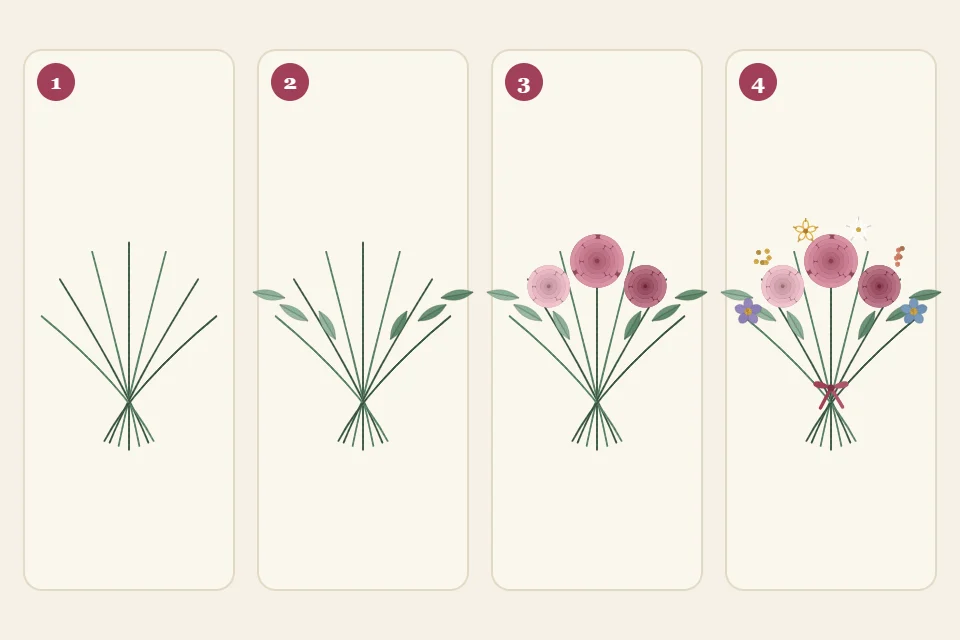
The tie and the bow
For the tie, work five or six horizontal satin stitches straight across the stems at the tie point, with three strands, making a band about 3/8 inch (1 cm) wide and 1/8 inch (3 mm) deep. Pull them just firmly enough to lie flat; the stems underneath pad the band slightly, which helps it look like wrapped ribbon.
Draw the bow on top of the finished stitching: two teardrop loops, each 1/2 inch (12 mm) long, slanting up and out from the band, and two tails 5/8 inch (1.5 cm) long hanging below with a slight outward curve. Outline the loops and tails in stem stitch with three strands, then cover the join with two small vertical satin stitches for the knot.
Tip
Pick the ribbon color from a flower already in the bouquet, usually the light value of the focal flowers. A brand-new color at the bow pulls attention away from the blooms.
Troubleshooting
- The bouquet looks flat-topped or square. The upper medium flowers are too far out. Keep them inside the dome outline and let only fillers and leaf tips reach the edge.
- The focal flowers merge into one mass. They are touching. Leave at least 1/8 inch between them and fill the gap with a leaf tip or a dark green knot.
- The stems look like one green block. Use both greens, and leave a hair of fabric between neighboring stems just above the tie.
- Fabric puckers under the roses. The weaving was pulled too tight. Let the thread rest against the previous round instead of tugging it in.
Change the bouquet
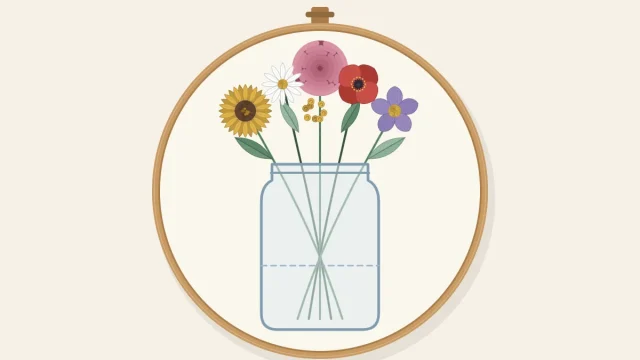
The plan works with other flowers in the same roles. Swap the roses for satin-stitch tulips or open daisies, or trade the knot sprays for rosebuds, but keep three focal flowers. If you would rather show the stems standing in water than tied with ribbon, the same triangle of focal flowers transfers directly to embroidered flowers in a vase.
Frequently asked questions
Why three focal flowers and not two or four?
Three flowers form a triangle, which gives the bouquet a clear top and a stable base. Even numbers tend to line up in rows or squares and look arranged rather than gathered.
Can I stitch the bouquet on a tote bag or shirt?
Yes, on non-stretch fabric with a stabilizer behind it. Choose flat flowers such as satin stitch or lazy daisies in place of woven roses, since raised stitches wear faster on items that are washed.
How many colors should a bouquet have?
Four or five flower colors plus two greens is plenty for a 6-inch hoop. Using a light and a dark value of the same color counts as variety without making the palette busier.
Should the bow be stitched before or after the flowers?
After. The tie and bow sit on top of the stems, and stitching them last lets you match the ribbon to the finished flowers and adjust the size of the loops to the space left.