Embroidered Flowers in a Vase: Stitching a Glass Jar Arrangement
Draw and stitch a simple glass jar with stems showing through the glass, then fill the top with roses, daisies and flower spikes at varied heights.
Tutorial at a glance
Materials
- 6-inch (15 cm) embroidery hoop
- 9-inch (23 cm) square of medium-weight cotton or cotton-linen blend
- Six-strand cotton embroidery floss: two greens, pale gray-blue, white, yellow and three flower colors
- Embroidery needle, size 7
- Water-soluble pen and ruler
- Small embroidery scissors
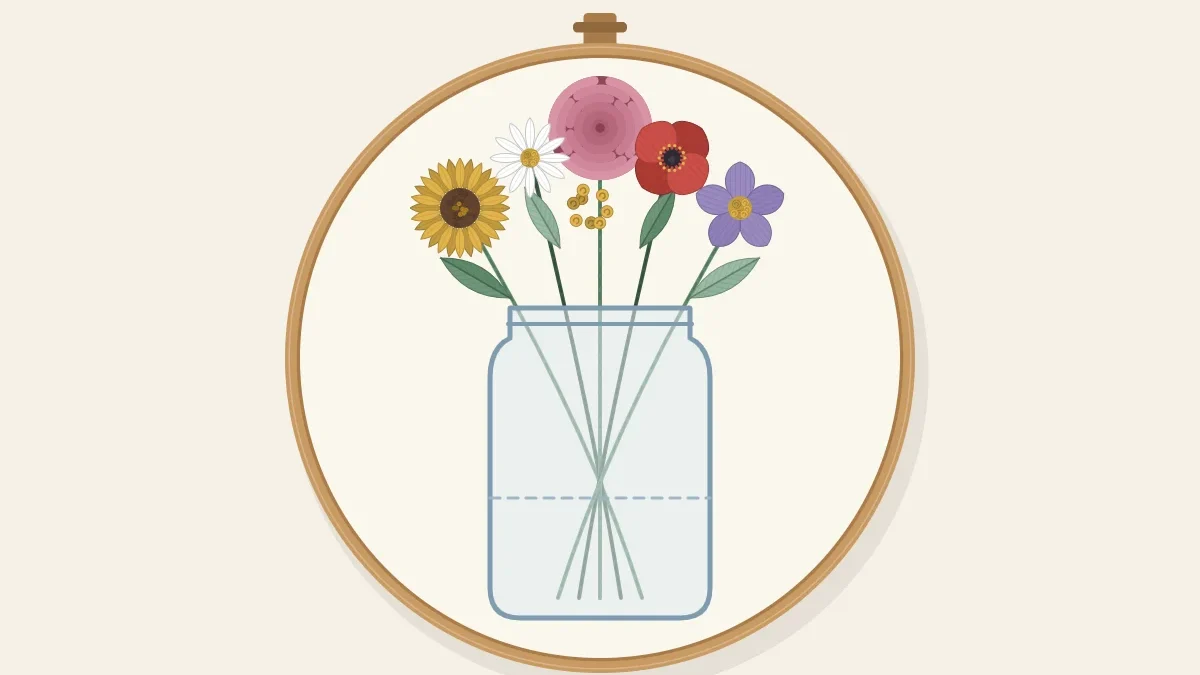
A vase gives a group of stitched flowers somewhere to stand. Instead of floating in the middle of the fabric, the stems gather into a container, and the whole design gets a clear bottom, a clear top and an obvious order to work in. A glass jar is the most forgiving container to stitch, because it is only an outline: the fabric shows through as the glass, and the stems inside it do most of the work.
Pick a container shape
Three simple outlines cover most arrangements. Each one suits a different number of stems, and the opening width decides how far the flowers can spread.
| Container | Size to draw | Holds | Good for |
|---|---|---|---|
| A. Straight jar | 1 1/2 in wide, 2 in tall (3.8 x 5 cm) | 5 to 7 stems | A full, loose bunch; the easiest shape to draw |
| B. Narrow bud vase | 3/4 in wide at the base, 3/8 in neck, 2 1/4 in tall (2 x 1 x 5.7 cm) | 1 to 3 stems | One showy flower with a bud or a leaf |
| C. Jug with a handle | 1 3/4 in wide, 1 3/4 in tall (4.5 x 4.5 cm), plus a 1/2 in handle loop | 5 to 7 stems | A solid, filled container where no stems show |
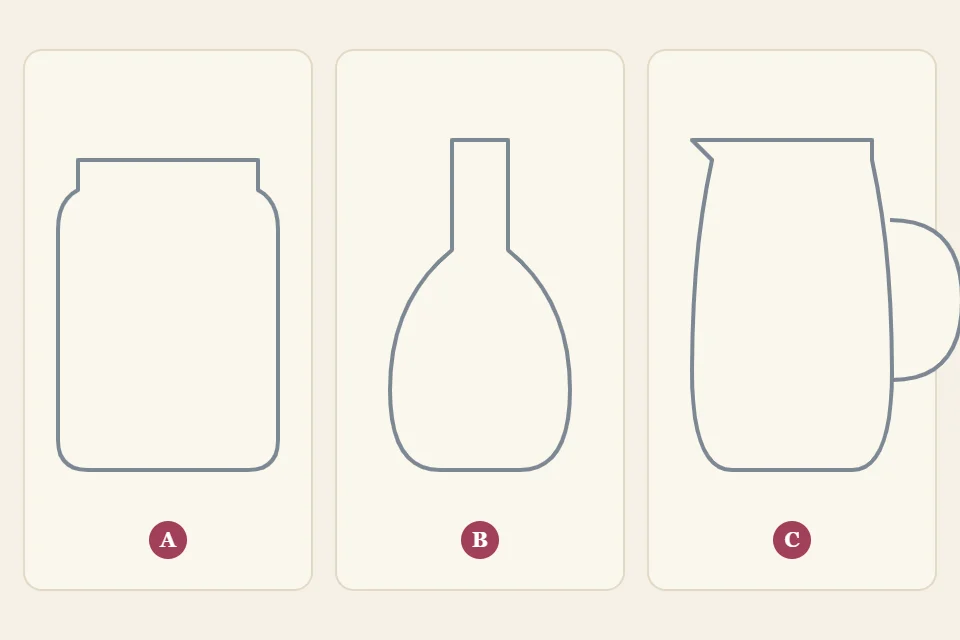
The rest of this project uses jar A. For B, follow the same steps with fewer stems. For C, skip the stems inside and fill the jug with rows of split stitch or satin stitch instead.
Draw the jar and the arrangement
The design fits a 6-inch (15 cm) hoop. Choose fabric that is not pure white, so the pale glass lines show.
- Mark the base line. Draw a 1 1/2-inch (3.8 cm) horizontal line, centered left to right, about 1 inch (2.5 cm) above the bottom of the hoop.
- Raise the sides. Draw two vertical lines 2 inches (5 cm) tall from the ends of the base. Round the two bottom corners so the jar does not look like a box.
- Add the rim. Join the tops of the sides with a flattened oval about 1/4 inch (6 mm) deep. The oval is what makes the jar read as round rather than flat.
- Draw the water line. Put a gently curved line across the jar about 5/8 inch (1.5 cm) below the rim, curving the same way as the front of the rim.
- Draw seven stems. Start each stem on the base line or near a bottom corner and take it up through the rim. Let two or three stems cross inside the jar. Above the rim, fan them out so the outermost stems lean about as far as the hoop allows.
- Set the heights. End the tallest stem 2 1/2 inches (6.5 cm) above the rim, slightly off center. End two stems at about 2 inches (5 cm), two at 1 1/2 inches (3.8 cm), and let the last two curve outward and finish only 3/4 inch (2 cm) above the rim so they spill over the edge.
- Mark the flower heads. Draw a 5/8-inch (1.5 cm) circle on the tallest stem and on one low stem for roses, 1/2-inch (1.2 cm) circles on three stems for daisies, and leave two stems plain for lavender-style spikes.
Stitch the stems behind the glass
Stems come first, because the glass has to lie on top of them. Cut six-strand cotton embroidery floss into lengths of about 18 inches (45 cm) and thread a size 7 embroidery needle. Work every stem in stem stitch with two strands of green, from the base of the jar up to the flower head, with stitches about 1/8 inch (3 mm) long.
Two small touches make the stems look as though they sit in water:
- Change green at the water line. Use the darker green below the line and the lighter green above it.
- Shift the stem sideways. Where a stem meets the water line, restart it about 1/16 inch (1.5 mm) to one side. That tiny break copies the way a stem looks bent where it enters water.
Where two stems cross, stitch the back one first and let the front one pass straight over it.
Outline the jar
Use one strand of pale gray-blue so the glass stays lighter than everything inside it. Backstitch the two sides and the base with stitches about 1/8 inch (3 mm) long, shortening them around the bottom corners. Stitch the rim oval the same way. Work the water line as a row of running stitches with small gaps, which reads as a surface rather than a solid edge.
Carry the outline over the stems, never under them: each crossing puts the glass in front.
Fill the top
Work from the back of the arrangement to the front, and from large flowers to small.
- Add leaves. Put two or three small leaves on each stem above the rim, none below it. Single detached chain stitches in two strands are enough; leaves under water would clutter the jar.
- Stitch the two roses. Fill the 5/8-inch circles with the woven wheel stitch, five spokes each, using three strands.
- Stitch the three daisies. Work five or six petals around each small circle with the lazy daisy stitch in two strands, then put one yellow French knot in the middle.
- Build the two spikes. On the plain stems, work pairs of short slanted straight stitches in two strands up the top 3/4 inch (2 cm) of each stem.
- Close the gaps. Look at the area just above the rim. If bare stems show there, add a few extra leaves or knots so the bunch looks full where it leaves the jar.
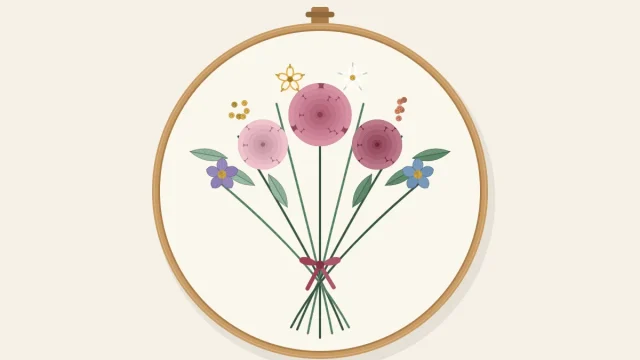
The planning ideas for mixing large, medium and filler flowers are the same ones used in the hand-tied bouquet, and they transfer directly to a vase.
Troubleshooting
- The jar looks lopsided. Fold the paper drawing in half down the center before transferring and check that the two sides match. On fabric, measure both sides from the base line rather than judging by eye.
- The glass outline disappears. The thread is too close to the fabric color. Go one shade darker, or use two strands for the sides and keep one strand for the rim and water line.
- The jar looks crowded. Seven stems is the limit for a 1 1/2-inch jar. Unpick one or two inside the glass and let those flowers appear to come from behind the others.
Frequently asked questions
Can I fill the glass jar with color instead of leaving it empty?
You can, but solid stitching hides the stems and the container stops looking like glass. If you want a tint, work a few widely spaced vertical straight stitches in one strand of pale blue and leave fabric showing between them.
What fabric color works best for a glass vase design?
Soft mid-tones such as oatmeal, pale sage or light blue let a gray-blue or white glass line show clearly. On pure white fabric the highlight stitches vanish and the jar outline has to be darker to be seen.
Do I have to use the flowers listed here?
No. Any mix works as long as you keep one or two large round flowers, a few medium ones and some tall narrow shapes. The container and stems are stitched the same way whatever goes on top.
How do I keep the stems from showing through as shadows behind the fabric?
End each stem thread at the base of the jar instead of carrying it across the back to the next stem. Dark green carried behind a light fabric can show from the front once the piece is mounted.