Floral Initial Embroidery: How to Stitch a Flower Monogram
Draw a bold 3 1/2-inch letter, place two flower clusters at opposite corners, and stitch a floral monogram that can still be read from across the room.
Tutorial at a glance
Materials
- 6-inch (15 cm) embroidery hoop
- 9-inch (23 cm) square of medium-weight cotton or cotton-linen blend
- Six-strand cotton embroidery floss: one dark letter color, two flower colors, yellow, one or two greens
- Embroidery needles, sizes 7 and 5
- Paper, pencil and ruler
- Water-soluble pen
- Small embroidery scissors
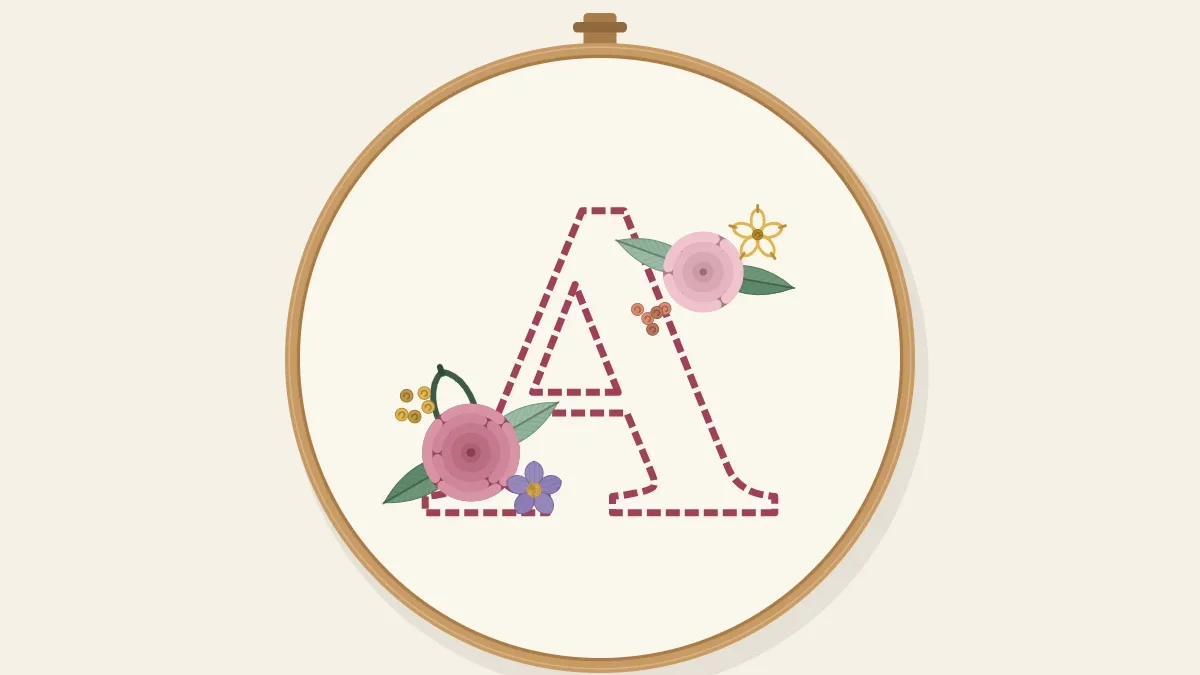
A floral initial is two designs sharing one space: a letter that has to stay readable, and flowers that want to spread. The piece works when the letter is drawn first, kept bold and plain, and the flowers are confined to two clusters that sit on it without swallowing it. Roughly two thirds of the letter should stay clear of flowers. Within that limit there is plenty of room for a rose, a few small blooms and a scatter of leaves.
Choose a letter style
Simple shapes carry flowers best. A plain block letter, with strokes of even width and no decoration, is the easiest to draw and to read. A serif letter, with small feet at the ends of the strokes, looks more traditional and gives handy ledges for flowers to rest on. Script letters with thin hairlines and loops are harder: the thin parts disappear behind even a small leaf.
For a 6-inch (15 cm) hoop, draw the letter 3 1/2 inches (9 cm) tall as a double-line outline, with strokes 3/8 inch (1 cm) wide. That leaves about 1 inch (2.5 cm) of fabric between the letter and the hoop for flowers that reach past the outline.
Draw the letter and place the flowers
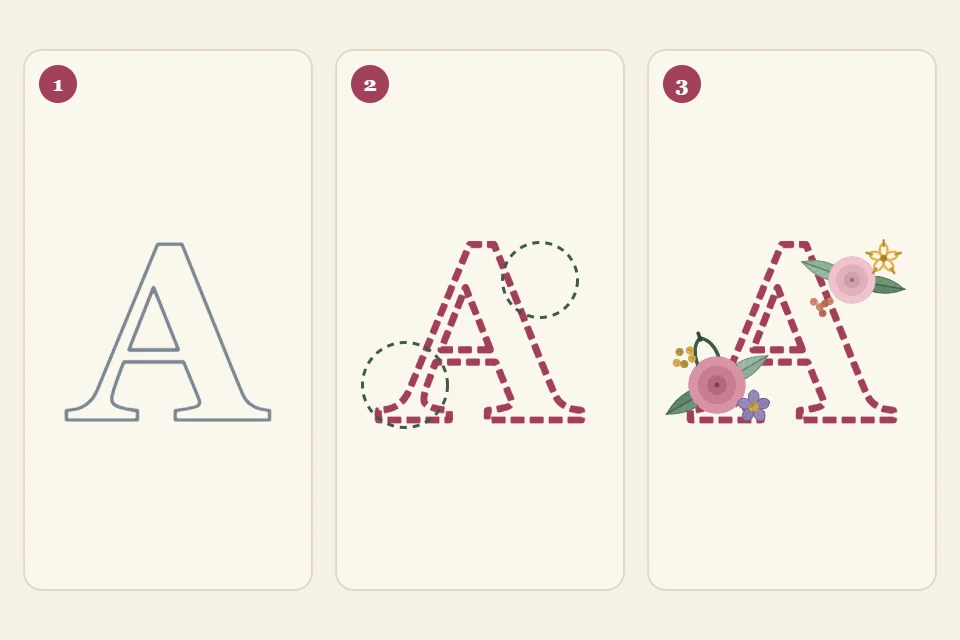
Work on paper first, in three stages.
- Draw the plain letter outline. Rule a box 3 1/2 inches (9 cm) tall and as wide as the letter needs, usually 2 1/4 to 2 3/4 inches (5.5 to 7 cm). Sketch the letter as single lines first, then draw a parallel line 3/16 inch (5 mm) to each side of every stroke to give the 3/8-inch width. Erase the single lines.
- Mark two cluster circles at opposite corners. Draw one circle about 1 1/4 inches (3.2 cm) across over the lower left of the letter and a second, about 1 inch (2.5 cm) across, over the upper right. Each circle should overlap the letter by about half its width and hang off the edge by the other half. Diagonal placement balances the design, and the difference in size stops it looking mechanical.
- Draw the flowers and leaves in. In the larger circle, draw one 5/8-inch (1.5 cm) circle for a rose, two five-petal flowers about 3/8 inch (1 cm) across, and three leaves 3/8 inch (1 cm) long pointing outward. In the smaller circle, draw one small rose circle 1/2 inch (1.2 cm) across, one five-petal flower and two leaves. Add three or four dots trailing off from each cluster for knot buds. Then erase the parts of the letter outline that pass under a flower or leaf.
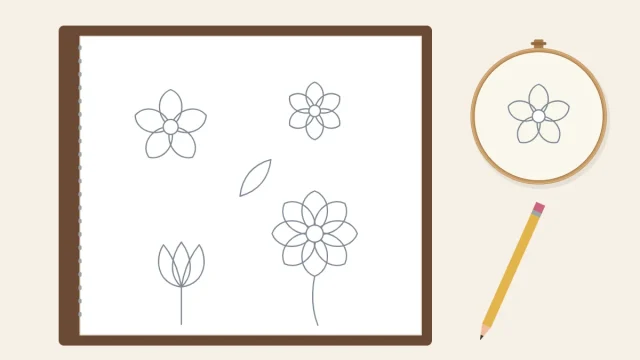
If drawing small flowers is new to you, the guide to drawing flower patterns shows how to build them from circles.
Where the clusters go on different letters
Lower left and upper right suit most letters, but every letter has one or two features that identify it. Keep those clear.
| Letters | Keep clear | Good cluster positions |
|---|---|---|
| A, H | The crossbar and the open space above or below it | The foot of the left leg and the top right |
| B, P, R | The enclosed spaces, and the leg of the R | The bottom of the upright and the top right curve |
| C, G, S | The opening on the right side | The lower left curve and the upper right end |
| E, F, L, T | The ends of the horizontal arms | The bottom left corner and the top of the upright |
| M, N, W, V | The inner points where strokes meet | One bottom left foot and one top right tip |
| O, Q, D | The center space, and the tail of the Q | Lower left and upper right of the ring |
Stitch the letter
Transfer the finished drawing to the fabric and hoop it drum-tight. Stitch the letter before the flowers, so petals and leaves can overlap the outline cleanly.
Outline the letter in stem stitch with three strands of six-strand cotton embroidery floss in the dark color and a size 7 embroidery needle, using stitches about 1/8 inch (3 mm) long and shortening them on curves. At each sharp corner, end the line by taking the needle down exactly on the corner point, then start the next side from that same point; stem stitch carried around a corner rounds it off. Stop the outline where it meets a cluster and start again on the far side.
The letter can stay as an open outline, which is light and quick. For a heavier look, fill the strokes with rows of stem stitch or split stitch worked side by side along the length of each stroke, about five rows for a 3/8-inch width.
Stitch the clusters
- Roses first. Work each rose circle in woven wheel stitch on five spokes, using four strands and the size 5 needle.
- Small flowers. Stitch five lazy daisy petals for each one in two strands, with a yellow French knot of two strands, wrapped twice, at the center.
- Leaves. Work each leaf in fishbone stitch or as two lazy daisy stitches side by side, in two strands of green. Angle them away from the middle of the cluster.
- Buds. Finish with French knots on the trailing dots, in two strands, getting farther apart as they move away from the cluster.
Tip
Prop the hoop up and step back about 6 feet (2 m) before adding anything extra. If the letter can be named at a glance, there is room for another leaf or two. If it takes a moment, stop.
Keep the letter readable
- Use contrast. Stitch the letter in a color clearly darker than the fabric and the flowers, such as navy, charcoal or deep green on a pale ground.
- Do not bridge gaps. A leaf that crosses the opening of a C turns it into an O. Keep every open space in the letter open.
Troubleshooting
- The letter looks wobbly. The stroke width varies. On paper, check the 3/8-inch width with a ruler at several points before transferring, and stitch exactly on the line rather than beside it.
- The letter is hard to read. The clusters are too large or too many. Remove the outermost leaves first, then a small flower; rarely does a rose need to go.
- Roses sit in a hollow. A filled letter beneath a flower adds bulk around it. Leave the fabric bare under the clusters and stitch flowers straight onto it.
Frequently asked questions
Can I print a letter from a computer instead of drawing it?
Yes. Type the letter in a plain bold typeface, enlarge it until it is about 3 1/2 inches (9 cm) tall, print it and trace the outline. Draw the flower clusters on the printout by hand.
Should the letter be filled or left as an outline?
An outline is faster and keeps the piece light, which suits a first attempt. A filled letter stands out more strongly from a distance but roughly doubles the stitching time.
Which letters are hardest to make into a floral initial?
Narrow letters such as I and J have little surface for flowers, so use one small cluster and let it extend beside the letter. Letters with small enclosed spaces, such as B and R, need those spaces kept completely clear.
Can I stitch a floral initial on clothing?
Yes, on stable woven fabric such as a cotton shirt or a denim pocket. Replace the woven wheel roses with flatter flowers, since raised stitches wear and snag more in the wash.