Easy Embroidered Lavender: A Tied Bundle of Sprigs
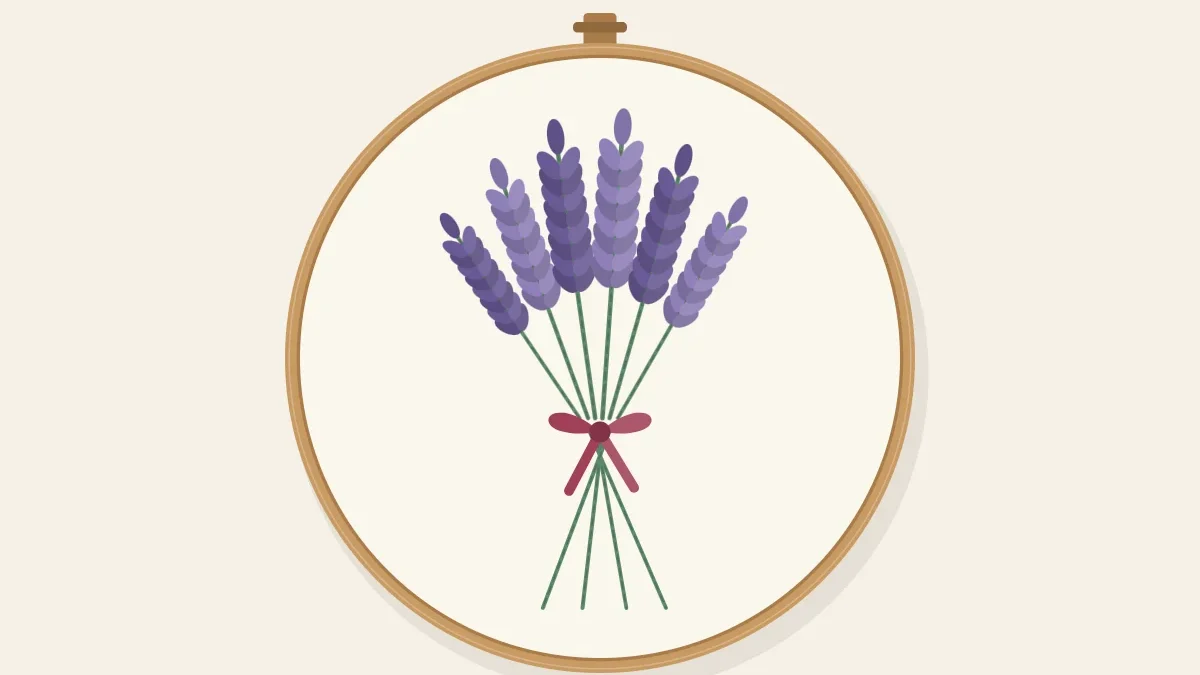
Five lavender sprigs made from stem stitch and pairs of short slanted stitches, gathered into a bundle and tied with a stitched bow. Measurements are included so you can draw the design yourself.
Tutorial at a glance
Materials
- Six-strand cotton embroidery floss in gray-green, medium purple and light lavender
- Floss in a ribbon color such as cream or blush
- Embroidery needle size 7
- 6-inch (15 cm) embroidery hoop
- 9-inch (23 cm) square of fabric
- Water-soluble pen and a ruler
- Small embroidery scissors
Lavender is the rare flower that needs no petals, no center and no filling. A sprig is a thin green line with short purple stitches set in pairs up its top third, and the eye reads it as lavender at once. That makes it one of the quickest flowers to embroider and a good second project after a daisy. Here, five sprigs are gathered into a small bundle and tied with a stitched bow, sized for a 6-inch (15 cm) hoop.
Materials
- Medium-weight, non-stretch cotton or cotton-linen blend in white, cream or natural, cut about 9 inches (23 cm) square
- Six-strand cotton embroidery floss in a gray-green, a medium purple and a lighter lavender, plus a ribbon color such as cream, blush or soft blue
- Embroidery needle size 7
- Water-soluble pen, ruler and small scissors
Cut each length of floss to about 18 inches (45 cm). Real lavender stems are silvery rather than bright, so a muted gray-green looks more convincing than a grassy one. If choosing shades feels uncertain, the guide to choosing colors for floral embroidery explains how to pick a light and a dark of one hue.
Drawing the bundle
Mark the center of the fabric with a dot. Test the pen on a scrap first. Then draw the design in this order:
- Tie point. Make a small cross 3/4 inch (2 cm) straight below the center dot. All five stems pass through it.
- Center stem. Draw a straight line from the tie point up 2 3/4 inches (7 cm).
- Inner pair. Draw one stem on each side, 2 1/2 inches (6.4 cm) long, leaning out so its tip sits about 5/8 inch (16 mm) from the tip of the center stem.
- Outer pair. Draw one more on each side, 2 1/4 inches (5.7 cm) long, with its tip another 5/8 inch (16 mm) further out. Give the outer stems a very slight outward curve.
- Stem ends. Continue every line 1 inch (2.5 cm) below the tie point. The lines cross there, so a stem that leans left above the tie ends up on the right below it.
- Flower spikes. Put a small tick across each stem 1 1/4 inches (3.2 cm) below its tip. The flowers go between the tick and the tip.
Stitching one sprig
Stitch all five sprigs the same way, starting with the center one. The three steps match the three numbered stages in the diagram.
- Stitch the stem. With two strands of green, work the whole line from its bottom end to its tip in stem stitch, using stitches about 3/16 inch (5 mm) long and keeping the working thread on the same side of the needle throughout. Within the flower spike, a plain backstitch is fine, since most of that section will be covered. The stem stitch tutorial covers the method in full.
- Add pairs of slanted stitches. Thread three strands of purple. Starting just above the tick mark, bring the needle up about 1/8 inch (3 mm) to the left of the stem and slightly higher than the point where you will go down, then take it down right on the stem. The stitch is about 3/16 inch (5 mm) long and slants up and outward at roughly 45 degrees. Make its partner on the right side, going down into the same spot or a thread away. Move 3/16 inch (5 mm) up the stem and repeat. Work six pairs in all, making the top two pairs a little shorter so the spike tapers.
- Finish with a tip stitch. Make one straight stitch, 3/16 inch (5 mm) long, in line with the stem at its very top, from above the tip down into the tip. This single stitch closes the spike and hides the end of the green line.

For depth, use the medium purple for the lower three pairs and the lighter lavender for the upper three pairs and the tip. Buds at the top of a real spike open last, so a paler tip reads as natural.
Other ways to stitch the florets
The same drawing works with two other stitches. Choose one per hoop, or use a different one on each sprig for variety.
| Floret stitch | Strands | Look | Notes |
|---|---|---|---|
| Slanted straight stitches | 3 | Slim, graphic | Fastest; six pairs and a tip stitch per sprig |
| Lazy daisy | 2 | Plump, open buds | Anchor each loop at its outer end; five pairs is enough |
| French knots | 3, two wraps | Dense, bobbly | Stagger knots left and right of the stem, about 14 per spike |
For looped florets, each one is a single detached chain, as explained under lazy daisy stitch. For the knotted version, cluster the knots more tightly at the base of the spike and thin them out toward the tip.
Tying the bundle with a bow
Work the bow last so it sits on top of the stems. Use three strands of the ribbon color.
- Wrap the stems. At the tie point, make three horizontal straight stitches, each about 1/4 inch (6 mm) long and stacked closely one above the next, across all five stems. They form the band of ribbon.
- Stitch the loops. From the right end of the band, make one lazy daisy stitch about 3/8 inch (10 mm) long, pointing up and to the right. Make a matching one from the same starting point pointing up and to the left, so the two loops spread like bow wings.
- Add the tails. From that same point, make two straight stitches about 1/2 inch (12 mm) long, angled down and apart. Vary their lengths slightly so the bow looks tied, not printed.
For a raised bow, skip steps 2 and 3: bring a full six-strand length up on one side of the band and down on the other, leaving both ends on the front, tie them in a real bow, and trim the tails.
Troubleshooting
- The spike looks like a ladder. The stitches are lying flat at right angles to the stem. Start each one higher than where it ends so it slants upward.
- Green shows through the flowers. Add one extra short stitch down the middle between pairs, or move the pairs closer together.
- The spike is as wide at the top as the bottom. Shorten the top two pairs to about 1/8 inch (3 mm).
- Stems look stiff and identical. Vary the heights when drawing and let the outer stems bend a little.
Frequently asked questions
What color floss looks most like real lavender?
A medium blue-leaning purple with a paler lavender for the tips is the usual choice. Avoid very red purples, which read more like heather or lilac.
Can I embroider lavender on a sachet or pillowcase?
Yes. Use the straight-stitch or lazy daisy version and keep stitches short so they do not catch. Stitch the design before sewing a sachet together, while the fabric still fits in a hoop.
Do lavender sprigs need leaves?
Not on the upper stem. Lavender leaves are narrow and grow low on the plant, so a tied bundle looks right without them. A few long, thin straight stitches near the base are enough if the design feels bare.
How do I make a single sprig instead of a bundle?
Draw one gently curved stem about 3 inches (7.5 cm) long, add the flower spike to the top 1 1/4 inches (3.2 cm) and leave out the bow. Three single sprigs side by side make a simple border.