How to Use an Embroidery Hoop: Tight Fabric, No Slipping
How to load fabric into an embroidery hoop so it stays drum-tight, choose between 4, 6 and 8 inch sizes, bind the inner ring and deal with hoop marks and slipping.
Tutorial at a glance
Materials
- 6-inch (15 cm) wooden or bamboo embroidery hoop
- Pressed fabric cut at least 2 inches (5 cm) larger than the hoop on every side
- Small screwdriver, if the hoop screw has a slot
- About 3 yards (2.7 m) of cotton twill tape for binding (optional)
- Needle and thread to secure the tape (optional)
An embroidery hoop does one job: it keeps the fabric under even tension so that every stitch is pulled against a firm surface. Slack fabric lets the thread drag the weave inward, and the result is puckering that no amount of pressing fully removes. Tight fabric lets you judge stitch tension by feel and place the needle exactly on a drawn line.
The parts of a hoop
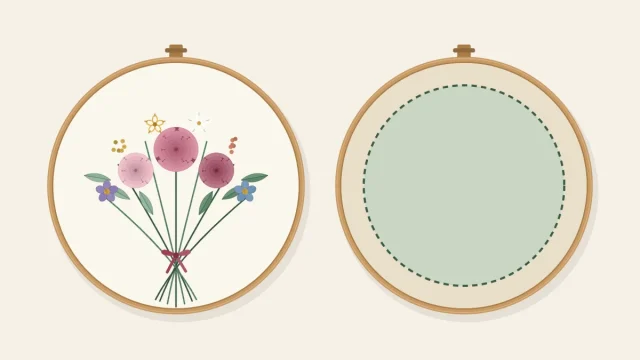
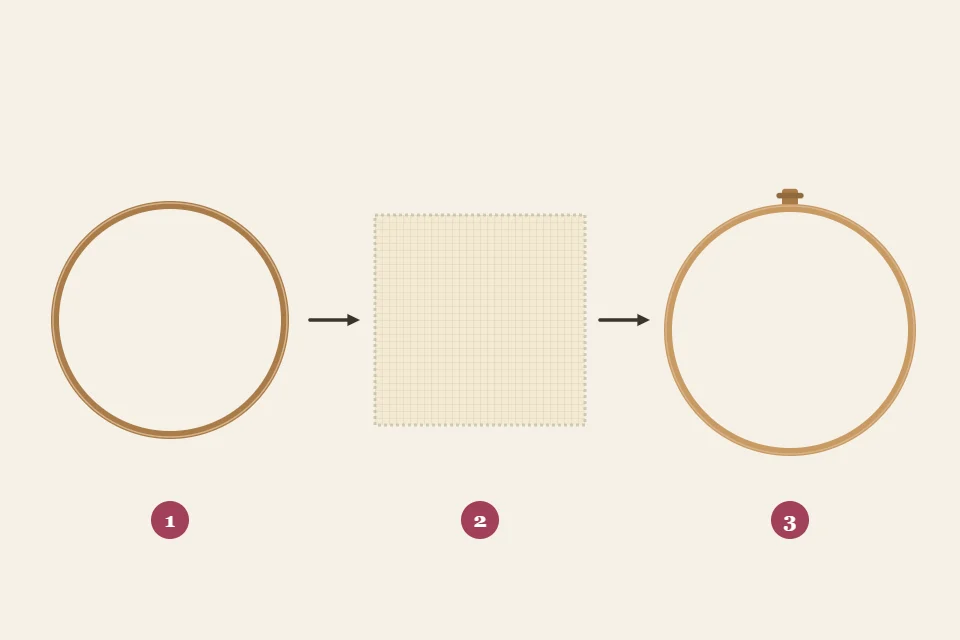
A standard hoop has three working parts. The inner ring is a plain, closed circle. The outer ring is slightly larger and split at one point, and the split is bridged by a metal screw that widens or narrows the ring. Fabric is sandwiched between the two rings, and turning the screw clamps it. Before using a new wooden or bamboo hoop, run a fingertip around both rings and sand away any splinter that could snag the cloth.
Loading the fabric drum-tight
Draw or transfer the design first, while the fabric can still lie flat on a table. Then build the hoop from the bottom up.
- Loosen the screw and separate the rings. Open it far enough that the outer ring will slide over the inner ring and one layer of fabric without force.
- Lay the inner ring flat on a table. A hard surface keeps everything level.
- Center the fabric over it, design side up. Check that the woven threads run straight up and down and side to side, not on a slant.
- Press the outer ring down over both. Put the screw at the top of the design. Push with the heels of both hands until the two rings sit level with each other.
- Tighten the screw partway. The fabric should be held but still able to slide when pulled.
- Pull the slack out in opposite pairs. Tug the fabric gently at the top, then the bottom, then left, then right, always pulling along the straight grain. Pulling on the diagonal stretches the weave and turns a round drawn flower into an oval.
- Tighten fully. Finish the screw with your fingers; if it has a slot, a quarter turn with a screwdriver adds grip.
- Test it. Tap the fabric with a fingertip. It should give a dull drum sound and spring back without leaving a dent.
If the working thread keeps catching on the screw as you stitch, turn the hoop so the screw sits a little toward the side away from your stitching hand: upper left for right-handed stitchers, upper right for left-handed.
Choosing a hoop size
Stitching right beside the ring is awkward because the needle has no room to tilt. Pick a hoop that leaves at least 3/4 inch (2 cm) of clear fabric between the design and the inner ring all the way around.
| Hoop | Comfortable design size | Good for |
|---|---|---|
| 4 inch (10 cm) | Up to about 2 1/2 inches (6 cm) | A single bloom, a short sprig, stitch samples |
| 6 inch (15 cm) | Up to about 4 1/2 inches (11 cm) | Most first projects: a few flowers with stems and leaves |
| 8 inch (20 cm) | Up to about 6 1/2 inches (16 cm) | Wreaths, bouquets and meadow scenes |
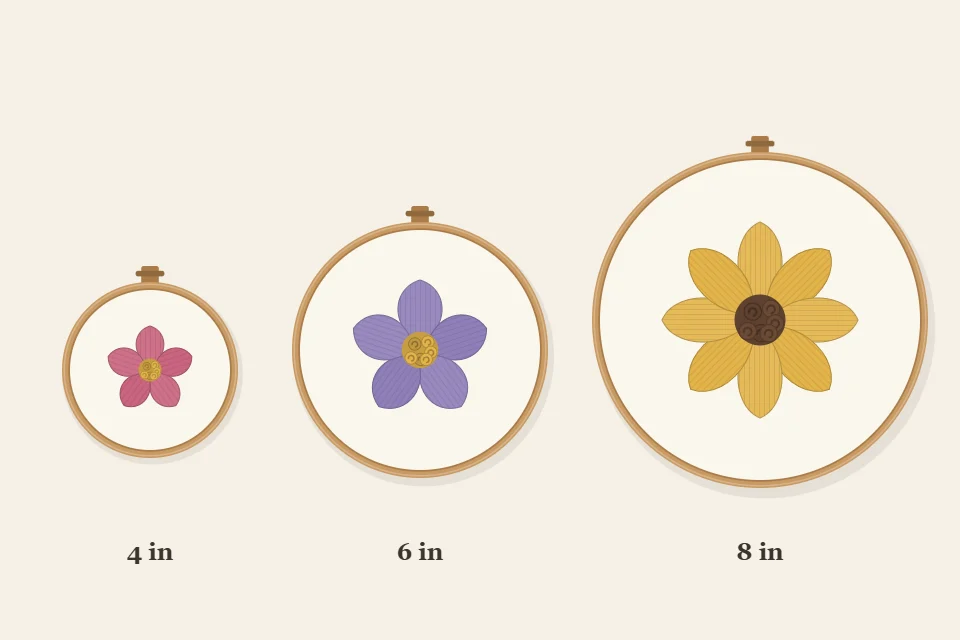
Hoop size also decides how much fabric to cut, since the cloth has to extend well past the ring for the hoop to grip it. The cutting sizes are in the guide to embroidery fabric.
Binding the inner ring
Binding means wrapping the inner ring in cotton tape. The wrap adds friction, takes up a slightly loose fit between the rings, and cushions the fabric, so it is the most reliable fix for a hoop that will not hold.
- Cut the tape. Use cotton twill tape 1/4 to 1/2 inch (6 to 12 mm) wide. A 6-inch (15 cm) hoop takes more than expected, so start with about 3 yards (2.7 m).
- Wrap on a slant. Hold the end against the inside of the ring and wind the tape around the wood, each turn overlapping the last by about half its width.
- Keep it flat and firm. Twists and loose turns make lumps that show up as uneven tension.
- Secure the end. Trim the tape and sew the end down with a few small stitches on the inside face of the ring, where a bump will not press into the fabric.
Preventing and removing hoop marks
A hoop left clamped for days presses a ring-shaped crease into the fabric, and skin oils can add a faint gray line along it.
- Take the fabric out of the hoop, or at least loosen the screw, at the end of every session.
- Wash and dry your hands before stitching.
- Tighten only until the fabric is taut; forcing the screw further crushes the weave.
- Use a bound inner ring on delicate fabric.
A crease that has set usually relaxes when the finished piece is rinsed and pressed face down, as described in finishing embroidery in the hoop. Test the iron’s heat on a scrap of the same fabric first.
Troubleshooting: when the fabric slips
Some loosening during a session is normal; pull the slack out again and re-tighten. If the fabric keeps sagging, look for one of these causes, and check the beginner supply list if the hoop itself is the problem.
- The screw is fully closed and the fabric still moves. The rings are too loose for thin cloth. Bind the inner ring, or hoop a second layer of plain cotton behind the fabric.
- Tension is tight on one side and slack on the other. The outer ring went on tilted. Take it off and press it down level.
- The fabric pops out at one edge. The piece is too small. At least 1 inch (2.5 cm) must extend beyond the ring everywhere.
- The drawn design looks stretched. The fabric was pulled on the diagonal. Remove it, press it flat and reload it along the grain.
- Finished stitches get flattened when the hoop is moved. Flat stitches recover, but knots and raised roses do not. Choose a hoop large enough to hold the whole design.
Tip
Hold the hoop in the hand you do not stitch with, thumb on top of the rim and fingers underneath, where they can guide the needle back up without pressing on the fabric and loosening it.
Frequently asked questions
Can fabric be too tight in an embroidery hoop?
Yes. If the weave looks stretched or the drawn lines bow outward, the fabric has been pulled past taut. Loosen the screw slightly and let it settle until the grain runs straight again.
Are plastic hoops as good as wooden ones?
Plastic hoops with a molded lip on the inner ring hold fabric firmly and work well for stitching. Wooden and bamboo hoops are the usual choice when the piece will be displayed in the hoop afterward.
Does the embroidery have to stay in the same hoop until it is finished?
No. The fabric can come out and go back in as often as needed, and it can be stitched in one hoop and displayed in another. Line up the grain each time so the design is not pulled out of shape.
What if the design is bigger than the hoop?
Stitch one section, then move the hoop along. Avoid clamping the rings over knots or raised stitches, and finish flat stitches in an area before moving on.